2.3. Creating a New One-Time Accounting Entry
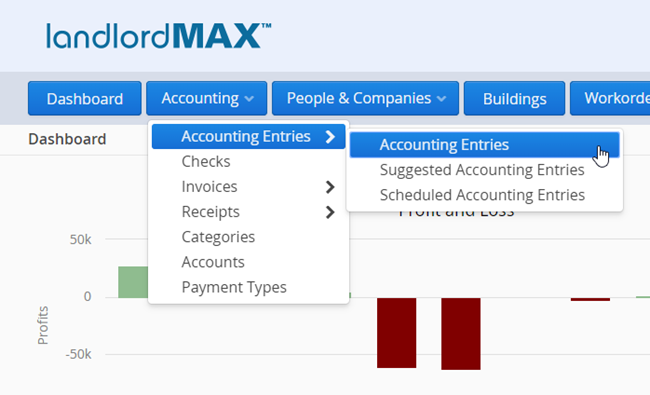
To create a new one-time Accounting Entry, go in the Accounting menu and click New.
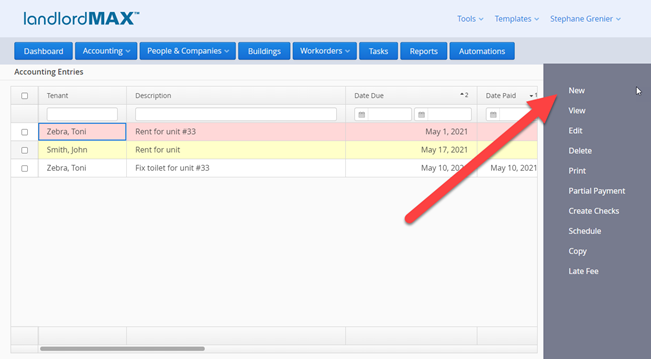
In the new window you will need to enter information about the new Accounting Entry.
STEP 1: Enter Dates
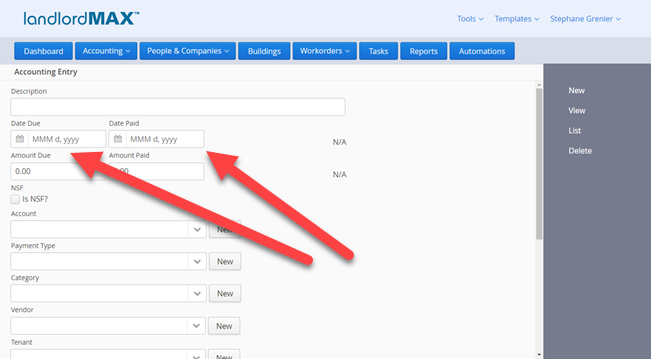
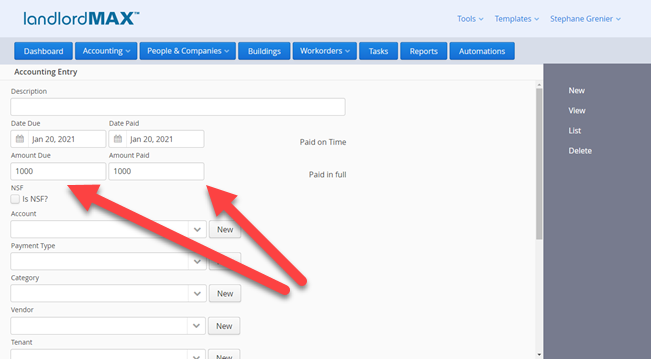
The date fields can be entered manually or with the popup calendar. The popup calendar is available by clicking on the icon on the left side of the date fields. If the dates are manually entered they must be formatted according to how their displayed (which can be set in "Your Settings"). In example screenshot the date format is MMM d, yyyy (for example Jan 20, 2021).
Along with standard Accounting Entries, you may also want to create entries for future payments or expenses. In these cases, you will enter the appropriate Date Due for the payment and omit the Date Paid.
The Date Discrepancy in the Accounting Entry is the difference between the Date Due and the Date Paid and will be calculated automatically by the program. This value is especially important for some people in the calculation of late fees. In the above screenshot the values are shown as N/A as no dates have yet been entered.
STEP 2: Enter Payment
Similar to the Date Due, the Amount Due field is really mainly there for informational purposes such as when a Tenant hasn't paid their rent so that you know how much is due for the rent.
For Partial Payments you will want to separate the amount due into two separate Accounting Entries by clicking on the "Partial" button on the right menu (this cannot be done while creating a new Accounting Entry, it can only be done on existing Accounting Entries.
So for example if you have a rent of $1000 due on Dec 1st where the tenant pays you $600 on Dec 1st and $400 on Dec 12th, you will need to create two separate Accounting Entries, one for each payment received (similar as you will have two line items in your bank statements, one for each payment made - regardless of when everything was due). This is all automatically done for you by the Partial button on the right menu.
In other words you have:
| Accounting Entry 1 | Accounting Entry 2 | |
| Date Due | Dec 1 | Dec 1 |
| Date Paid | Dec 1 | Dec 12 |
| Amount Due | $600 | $400 |
| Amount Paid | $600 | $400 |
| Amount Remaining | $0 | $0 |
If the second payment hasn't yet been made (for example it's just Dec 10th and the Dec 12th payment hasn't yet been made), then the Date Paid and Amount Paid would remain empty for the second Accounting Entry, meaning it would be considered a late Accounting Entry.
For non-payments you can select the NSF checkbox. It can happen that a tenant never pays a rent due or another bill he owes to the property owners. If you do not count on them ever paying the amount, then we do recommend you to keep a record of the Accounting Entry that was never paid should you ever need to go to court, etc. Checking the NSF checkbox tells the software that the amount will never be paid and it is no longer in the late accounting entries list. As well the software will then close the Accounting Entry so that you no longer see it with an Amount Remaining to be paid.
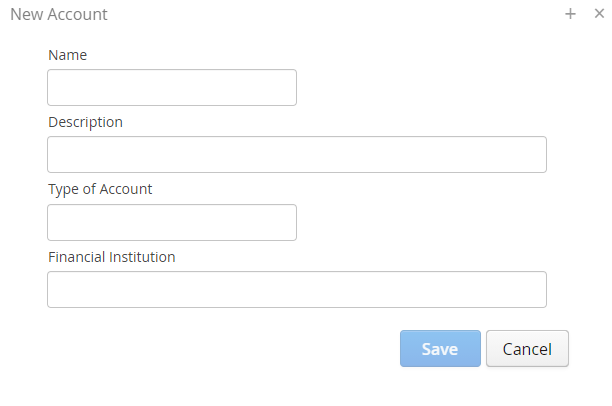
Step 3: Select the Account
You may have more than one Account where to process a payment (an Account can be a financial institution, it can be a cash account, it can be as simple as a budgetary account, and so on). By clicking on the New button next to this field, you can create as many Accounts as you need (you can also manage the Accounts in the Accounts section of the software). When you click on the New button pop-up window will open where you will enter the specific information about the Account.
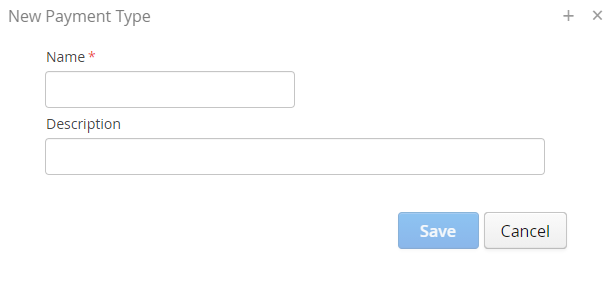
Step 4: Select the Payment Type
Next you can record the Payment Type you will deal with. In the dropped down list of this field you will find several options to choose from such as cash, check, credit card, etc. You may as well create a new type of payment if you wish by clicking on the New button on the right of the field which will then automatically appear in the list. Similarly to Accounts you can manage Payment Types in the Payment Types section of the software.
STEP 5: Select the Category
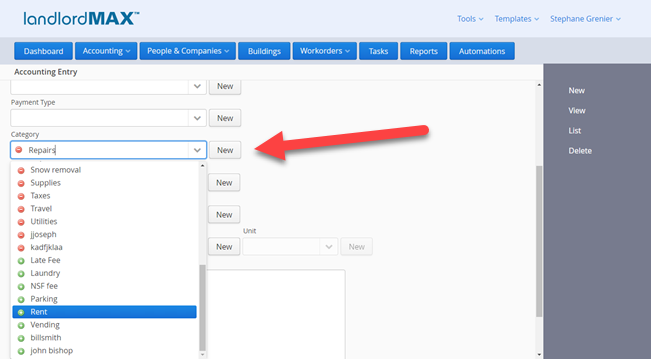
LandlordMax has some pre-created default Categories which includes revenues and expenses such as rent, insurance, repairs, etc from which you can select. You can however also create as many custom Categories as you need or wish. Categories can then be managed in the Categories section of the software.
Categories will grouped together and color coded, so that all expenses and all revenue categories are sequential. This will help facilitate searches of specific entries among all the others via the reports and filters. Please note that if you start to type in the name of the Category in the field it will automatically find it and select it for you. In other words it will limit the list of Categories to what matches what you've typed in.
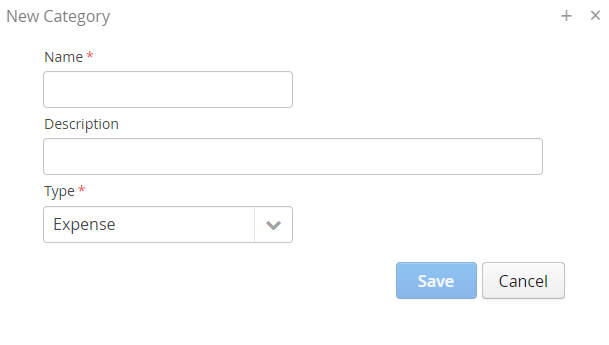
Again if there is no suitable category to select from and you wish to create a new one, you can just click on the New button to the right of the field to immediately create a new one to use.
STEP 6: Select the Vendor, Tenant, Building, and/or Unit associated with the payment
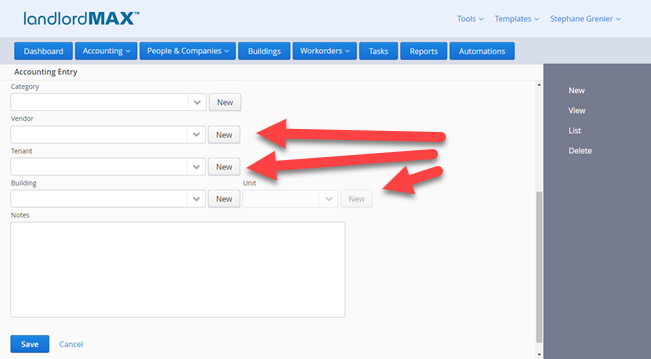
The last step is to associate the Accounting Entry to a Vendor, a Tenant, a Building, and/or a Unit. All fields are completely optional. And similar to the categories, this will help group together related Accounting Entries for the reports such as trying to run the Accounting entries for a building report.
By clicking on the arrow of the respective field, you will find a list of the Vendors, Tenants, Buildings, and/or Units that you have already recorded in your database. If the one you are looking for is missing you can again use the New button on the right to create a new entry on the spot. Please note however that the popup will be limited in fields compared to the full view. That is to say for example that the new Tenant popup will be limited compared to when you go to the Tenant's screen.
* To enable the Unit field, a multi-unit Building must first be selected.