6.2. E-mails
LandlordMax lets you send emails directly from within the program. It is a time saving feature in that you don't need to step outside of the software, remember an email address, etc. to send a commuication. Therefore, if you are working in LandlordMax and need to send an email, an invoice, a report, etc. you can do it right then and there without having to open your email software.
The first thing you need to do if you want to be able to send emails through LandlordMax is to set the email preferences.
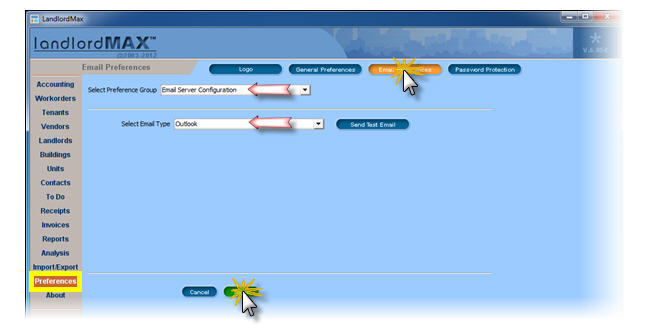
STEP 1: Set up email server configuration
Go to Preferences menu, click Email preferences at the top of the screen, in the first field Select Preference Group, choose Email Server Configuration from the dropdown list. In the second field Select Email Type chose between Mail sever, Outlook, Gmail from the dropdown list. Enter the info if specified and then click Save at the bottom of the screen.
If you are working with Outlook, your emails will be sent through the default email account you have set up in Outlook. If you have more than one email account setup, again please note that it will use the email addressed configured as the default one in Outlook. The software only supports Outlook and not Outlook Express, Windows Mail, or Windows Live Mail.
If you select Gmail, please note that you have to enabled third party access from your gmail account. Please note that Gmail, Gmail, Yahoo Mail, etc. all generally require you to allow third party software systems to connect to your email account to work. In other words there is a setting within your Gmail account on their website that you need to set to give permissions to programs like LandlordMax to connect and work.
Although the free email services such as Gmail label it as: "allow less secure apps to connect to gmail", this is more for cloud based setups than desktop applications where OAuth (their prefered authentication method) is NOT available. The link to the instructions for Gmail is: https://support.google.com/accounts/answer/6010255?hl=en You can also read an article written by one of the original designers of the OAuth authentication used by Gmail at: http://hueniverse.com/2012/07/26/oauth-2-0-and-the-road-to-hell/ which basically explains that both systems are pretty much equivalent in terms of security.

If you have an internet provider such as Comcast, Rogers, etc., or your own domain (mailserver), you need to enter the information specific to your email server. This information is specific to your email server (mailserver) and is not something we can provide. For example, port 25 is the default email port for most mailservers, however it's not uncommon for many email service providers to change the ports to make it harder for spammers and such. This is a value you have to get from your email service provider, it's not something we know. Don't hesitate to contact them or whoever helped you setup your email.
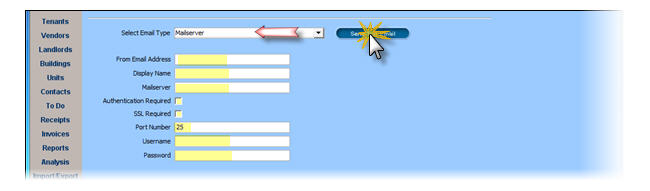
We then suggest you to click Send Test Email on the right side of the screen and send yourself a little test email message to make sure everything is set up correctly.
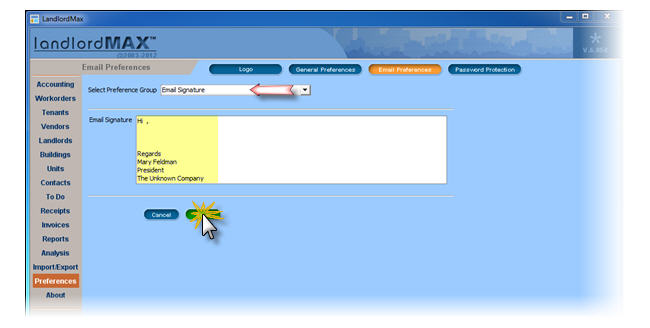
STEP 2: Set up email signature
You can set up an automatic email signature which is basically a template to start all your email addresses with. For example you may want your contact info be displayed at the end of every email you send as illustrated below.
Go to Preferences menu, click Email preferences at the top of the screen, in the first field Select Preference Group, choose Email Signature from the dropdown list. In the box below, type your template and then click Save at the bottom of the screen.
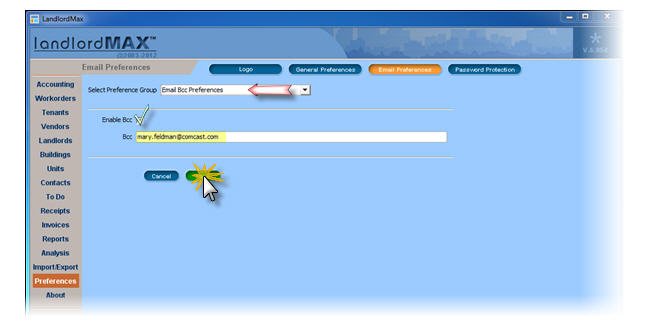
STEP 3: Set up BCC email preferences
BCC are like sending a hidden copy of your message to yourself or someone else. This is not necessary for Outlook or Gmail because they automatically record all emails you sent in a special folder called "sent". But it is useful for other mail servers since LandlordMax does not keep a history of your sent emails if you wish to keep them. A general rule of thumb with BCC and sent emails is that if you don't know what they are, you probably don't need them.
Go to Preferences menu, click Email preferences at the top of the screen, in the first field Select Preference Group choose Email BCC Preferences from the dropdown list. Tick the box Enable BCC, below type your own email address (or any other you may wish to use) and then click Save at the bottom of the screen.
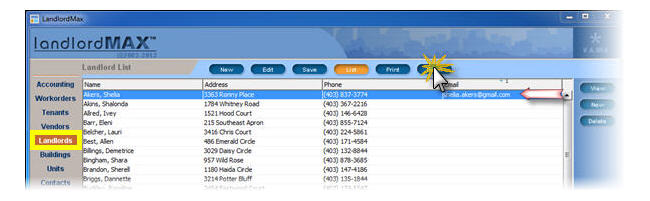
STEP 4: Send an email to a contact
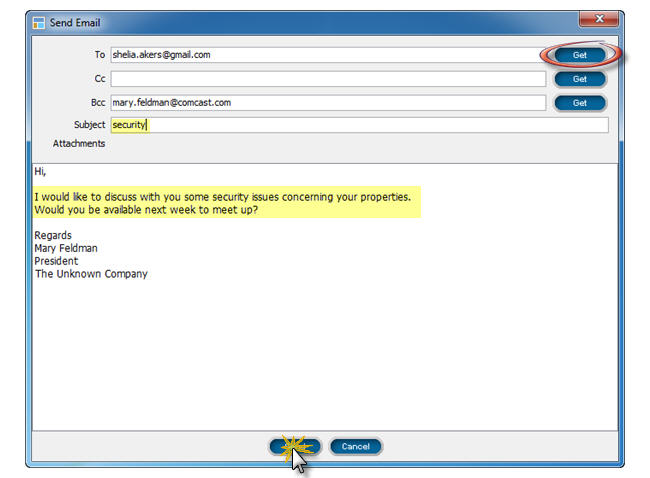
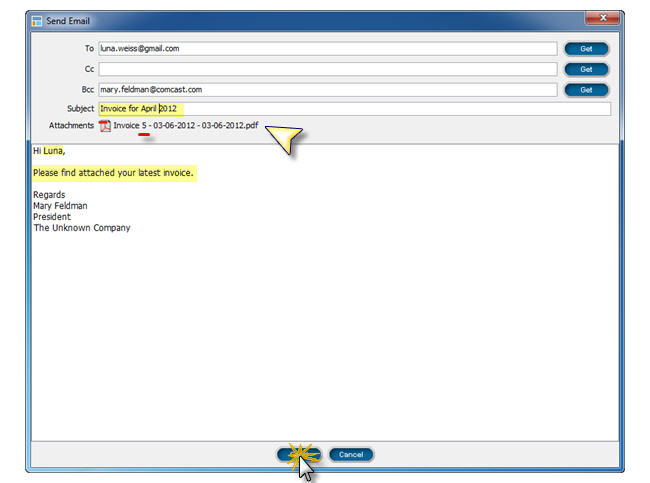
Let say you are working in LandlordMax and want to send a an email to one of your contact, depending on if the person is a landlord tenant etc., go to the corresponding menu on the left, click on the name of the person and click Email in the top menu. Note that you can select more than one name to send your email to, their email addresses will all appear in the "To" field. In the email that popups, add a subject and type in a message then click on Send to send the email.
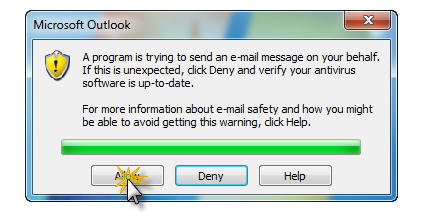
Outlook may then open a message window (depending on your security settings OR if you're antivirus solution is not updated) to ask permission for LandlordMax to access it. If it does click Allow in order for your message to be send. **Important Notice: Note that it is possible that this message is hidden behind the LandlordMax screen.
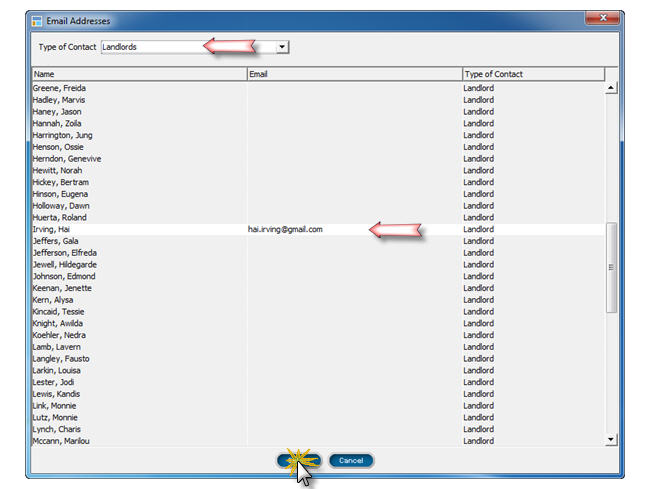
You can also choose to add another person to send your email to in the popup window by typing an email address directly in one of the appropriate fields or by clicking on Get on the right side to get further email addresses from within the software.
If you click Get, a popup window will appear at the top of which there is a field where you can chose the Type of Contact from a dropdown list, choose between All, Contacts, Landlords, Tenants or Vendors. Scroll down the list of names and click on the one (or the ones) you want to send the email to, then click Select at the bottom of the window. Note that if the names are greyed out it means that there is no email configured for that name in the database.
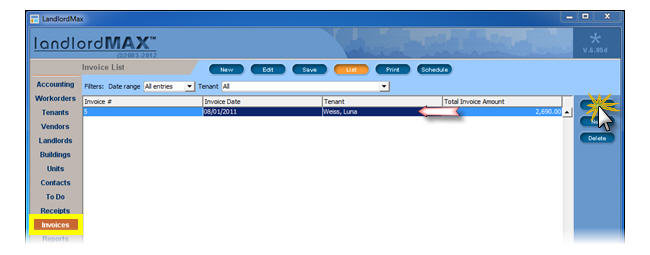
STEP 5: Send an invoice or receipt by email
You can send any email or invoice directly to the tenant by email from right within the software.
Go to Invoice Menu, choose to View one invoice from the list you have, then click on Email at the top menu. By default, the invoice will set the "To" field to the tenant specified in the invoice. In the email that popups, add a subject and type in a message then send. Note the file attached name is corresponding to the invoice number.
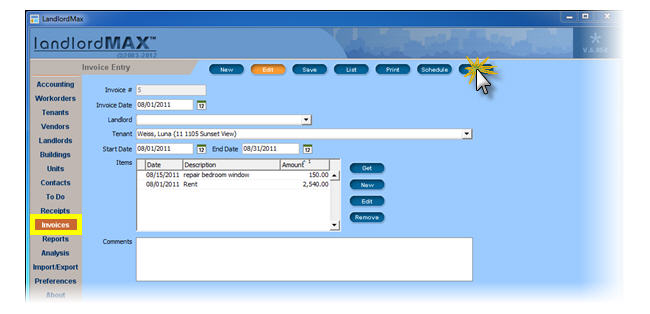
You can only email one Invoice at a time because of several reasons. Firstly each invoice requires a different "to:", attached file, and a different message. As well, sending all your invoices at the same time can result in your email address, domain, and/or server being incorrectly flagged as sending spam emails which can lead to all sorts of complications and problems for your email address. In other words you don't want to be incorrectly flagged as a spam mailserver which can happen if you send too many emails all at once in an automated manner.
STEP 6: Send a report by email
One very handy feature you can do is send reports by email directly within the software without having to export your report, open your email software, attached the report and then send it.
Go in Report Menu, generate a report of your choice, click Email on the right side of the screen. In the email that popups, type the email address of the person you want to send this report or click Get on the right side to find the email address from the bank of contacts you have in LandlordMax.
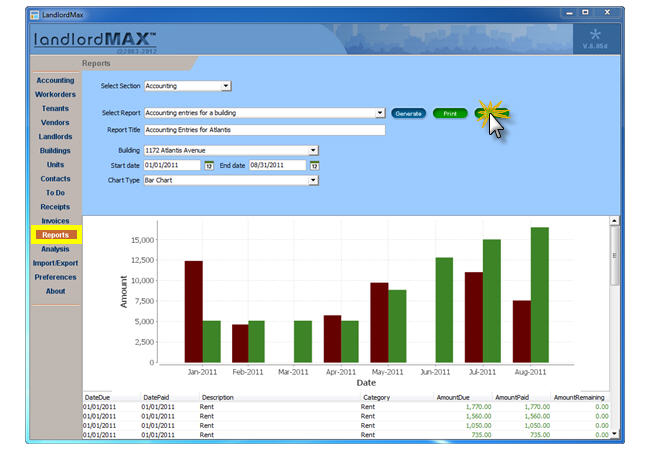
Type in the subject and message. The report will be automatically attached to you and be named according to the title you used for the report in (from the "Report Title" field). You can then click on the Send button to send the email.